Thursday, November 28, 2013

Thanksgiving Traditions: Cornbread Stuffing and Christmas Vacation

Turkey Name Cards
My family doesn’t have too many sacred traditions when it comes to the holidays, but one thing you don’t mess with is the food, specifically my mom’s cornbread stuffing.  Every year a beautiful turkey, maple honey ham, and sautéed green beans are just the few dishes laid out on the table.  Cornbread stuffing is a staple, much like green bean casserole, that no matter what relative’s house we are at, it is present.

Preparations for the stuffing starts at the beginning of the week, when my mom makes the cornbread and lets it sit in the oven, for three days to dry out.  Of course, she makes it from scratch and you can’t help but take a big, chunk and spread butter on it.  I don’t even wait until it has cooled down.  It’s buttery, moist, and delicious.  My mom will not allow me to share her cornbread recipe it is her guarded secret, I’m lucky she let me share her cornbread recipe.  All I know is that she mixes together cornmeal, butter, eggs, buttermilk, and baking powder.
Carnage of Thanksgiving Dinner

Thanksgiving day, the stuffing comes together and the whole house smells like Italian sausage and onions sautéing in butter and herbs.  My mom puts an unhealthy amount of butter into it: two full sticks.  But that’s what makes it taste oh so good.  Again, I can’t control myself to wait until it has been baked in the oven to get a nice golden, crunchy crust on top.  As soon as my mom turns her back, I sneak a bowlful usually before she has a chance to yell, "Get out of here!" or slap my hand away.  Hey, someone has to be quality control.

This year we had Thanksgiving at my brother's new house.  I left the night before to help him get ready: prep the turkey, ham, etc.  In the morning we dressed the turkey and put it into the oven at 9 o'clock. Four hours later the turkey is beautiful and golden brown.  My future sister-in-law is taking pictures of my brother craving the turkey, his first turkey.  Finally we were able to eat and after not eating all morning I was hungry.

That's when I hear, "It's still raw!"

Let me take you back to earlier in the morning.  My brother, the brilliant pharmacist he is, thought it was fine that the oven was left open a crack due to the pan not fitting.  Yes, that's right, he left the oven open even after I told him it wasn't a good idea and we wonder why the turkey wasn't done yet.  Meanwhile my sister-in-law to be is in the corner, freaking out almost in tears.  Seeing that his daughter is close to the edge, her dad jokes about putting back into the oven for another hour.  Trying to diffuse the situation, my mom bringing no attention to herself pops the turkey, all 13 pounds, in to the microwave for a quick zap.

Once the food finally hit the table my loud, obnoxious family is quiet for a few short minutes.  Conversions begin ranging from terrible childhood memories of sitting at the dinner table refusing to eat brussel sprouts to claiming optimum sleeping real estate.

My uncle, by marriage, has even learned that at our house, you don’t need to eat a “safety meal.”  What’s a “safety meal” you’re asking yourself?  It is a meal you eat prior to dining at someone else’s house for the first time.  It keeps you safe from going hungry if there is too little of food or the food just isn’t good.  The first holiday he spent with us, he made the mistake of eating before he came.  That was his “safety meal” because he feared we wouldn’t have enough food for his empty stomach.  He now knows that we always have enough food.

Cornbread stuffing is even better as leftovers.   All you have to do is fry it in a pan with oil to get a golden crust on all sides.  I eat so much of it that I won’t want to eat it again until next Thanksgiving.
My uncle, who was the first to pass out
With full bellies we commence our countdown to Christmas by watching National Lampoon’s Christmas Vacation.  Dad is in his chair, snoring after sitting down for five minutes as we turn the volume up to hear over the obnoxious sound.  While I hate watching Hallmark Channel Christmas movies at the beginning of November, nothing says the holidays like hearing Cousin Eddie yell, “S@$tter was full!”


We’ve even begun to put a stuffed animal squirrel in our tree to reference the hilarious squirrel scene.  During dinner whenever anybody asks someone to say “Grace”, my brother will say, "Grace? She died thirty years ago!"  Then my Uncle joins in and they will reenact this scene from National Lampoon's Christmas Vacation:


Thanksgiving ends with me being thankful for my family however crazy they may be, there are always the Griswold’s to make me feel better.  Happy Thanksgiving!
Cornbread and Sausage Stuffing
Yield: 13"x9" pan
Prep Time: 40 minutes
Bake Time: 30 minutes

Ingredients:
  • 8 cups cubed cornbread
  • 1 pound Italian sausage, out of casing
  • 2 cups celery, chopped
  • 2 cups onion, chopped
  • 2 sticks butter
  • 2 teaspoons poultry seasoning
  • 3 tablespoons fresh parsley, chopped
  • 1 quart chicken stock
  • Salt and peper, to taste
Directions:
  1. Preheat oven to 350 degrees
  2. Two days ahead make cornbread and allow to sit uncovered 
  3. Remove italian sausage from it's casing and cook over medium heat until browned.
  4. In a large pan, saute celery and onion in butter until they are translucent, add sausage.
  5. To the pan, add the poultry seasoning and parsley, salt and pepper to taste.  Set aside to cool.
  6. In a large mixing bowl, combine cornbread and sausage mixtures.  Mix and add enough chicken stock to make wet, you may not need the whole quart.
  7. Bake in the oven for 30 minutes or until the top is golden brown.

Tuesday, November 26, 2013

Outside The Box: Apple Streusel Cheesecake Bars

For those of you who use sugar cookie mixes, you don’t have to just make cookies with them anymore.  A great use for the mix is to use it as a crust for cheesecake bars.  You can use this as a moment to be creative and add additional flavors to the dough- thinking outside the box (cliché, I know).  Adding citrus zest, vanilla, or buttermilk help to take the dough from basic to unique.  For the crust, I just spread it evenly in the bottom of the pan and baked it just like I would if I was making cookies.

My obsession with apples has continued to grow over the remainder of the fall season.  At our house we currently have about 10 pounds of apples sitting on our back porch.  All of which are either being eaten, made into applesauce, or waiting to be put into that apple pie I plan on making for Thanksgiving.

The streusel topping creates a crunch before you bite into the creamy, cheesecake filling speckled with spiced apples.  Finishing your bite is a soft and chewy cookie crust


Apple Streusel Cheesecake Bars

Yield: 12 squares (9"x11" pan)
Prep Time: 15-20 minutes
Bake Time: 45-50 minutes

Ingredients:
          For Crust:
  • 1 package sugar cookie mix
  • 1/2 stick butter, melted
  • 2 tablespoons buttermilk
          For Filling:
  • 8 ounces package cream cheese, softened
  • 1/4 cup sugar
  • 1 egg
  • 1 teaspoon lemon zest
  • 1 teaspoon vanilla
  • 3 apples, peeled, chopped
  • 2 tablespoons sugar
  • 2 teaspoons cinnamon
  • 1 teaspoon nutmeg
           For Streusel Topping:
  • 1/2 cup light brown sugar
  • 1/2 cup flour
  • 1/2 stick butter, cold
  • 1/2 cup pecans, chopped
Directions:
  1. Preheat oven to 375 degrees.
  2. Combine the sugar cookie package with melted butter and buttermilk until a dough forms.  Spread evenly into a non greased pan and bake 10-15 minutes until edges are golden brown.
  3. In the bowl of a stand mixer, cream the cream cheese with the sugar until smooth.
  4. Add egg, lemon zest, and vanilla. Set aside.
  5. Coat apples with sugar, cinnamon, and nutmeg.  Set aside.
  6. With a fork, combine light brown sugar, flour, butter, and pecans until the mixture is crumbly and coarse. 
  7. After crust has been baked, spread cream cheese mixture evenly on top.  Spoon apples evenly over top the cream cheese and top apples with streusel topping.
  8. Bake for 40-45 minutes or until the cream cheese has set and the topping is golden brown.

Outside The Box: Beer Soft Pretzels

If you read my past post on beer bread, you know that I am currently facing the challenge of getting rid of a refrigerator full of beer.  I’m serious thinking about giving everyone a loaf of beer bread for Christmas.
 
While cleaning out my pantry I stumbled upon a box of Auntie Anne's pretzel mix.  My neighbor says that Auntie Anne’s are dessert pretzels.  She is from Philadelphia and grew up on the Philly Pretzel Factory, which are “real pretzels” to her.  To me a pretzel is a pretzel but she will argue that point.  Beer and pretzels make a good combo right?  That’s what I thought.  The beer I used was made by the Dark House Brewing Company and was called Artic Dekoorc Eert.  Honestly I picked that beer because of the picture on the label, a zombie with a chainsaw.

Soft pretzels are the best right after they have been brushed with butter and are still warm from the oven.  You don’t get the same outside crust with soft and fluffy dough inside the day after.  So don't feel bad if you eat them all in one night.  The beer gave the pretzels a nice citrus flavor with a just the right amount of sweetness. Pair these pretzels with a hot and cheesy dip and you have the perfect weekend snack.

Beer Soft Pretzels

Yields: 8-10 large pretzels
Prep Time: 40-50 minutes
Bake Time: 8-10 minutes

Ingredients:


  • 1 box of soft pretzel mix (should include a packet of yeast, flour, salt, and baking soda)
  • 1 1/4 cups of beer, any kind
  • 4 cup hot water
  • 4 tablespoons butter, melted
Method:
  1. In a medium bowl, dissolve the yeast from the mix with lukewarm beer. (I heated the beer for 30 seconds in the microwave).  Let set for 2 minutes until it begins to foam.
  2. In the bowl of a stand mixer, add yeast mixture to the flour packet from the mix.  Continue to mix the dough of low spend for about 1 minute.  Increase the speed to medium low and continue to mix for another 4 minutes, until the dough forms a soft and smooth ball.
  3. Coat a medium bowl with oil and place dough into the ball, cover with plastic and rise for 30 minutes or until doubled in size.  This works best in a warm place.
  4. Preheat oven to 425 degrees.
  5. After dough has doubled in size, turn out onto work surface.  Roll dough into desired shapes.  You can create pretzel sticks or the normal pretzel shape.
  6. After you have shaped your pretzels, in a medium bowl dissolve the baking soda packet into the 4 cups of hot water.  Quickly dip each pretzel into the solution and drain off the excess before placing onto a lightly greased baking sheet.
  7. Sprinkle with salt and bake in the oven for 8-10 minutes or until golden brown.
  8. Once out of the oven brush pretzels with melted butter and enjoy!

Monday, November 25, 2013

Make it at Home: Granola Bars

After goggling the history of granola bars, I was surprised to find that the same man who invented these snacks also invented the squeezable ketchup bottle, dental floss dispensers, and heated pizza boxes.  You learn something knew everyday.  Granola bars are great to snack on in the middle of the day or while on a hike, due to the insane amount of calories they provide.  But how healthy can granola bars be?  I can’t even pronounce the many preservatives and chemicals found in store-bought granola bars.  Last year, I stumbled upon a recipe for homemade granola bars and haven’t bought any since.  I was on a granola bar kick for a while.  It is incredibly simple; one bowl is all you need.  Everything gets tossed together and baked in the oven for 10 minutes.  What you get is a chewy, sweet, and healthy snack.
The best part about these granola bars, besides being easy to make, is that you can add anything you want to them.  I use this as any opportunity to clean out my pantry.  I usually add a handful of this and a handful of that, using anything that may be leftover from previous baking.  A handful of almond, shredded coconut, dried cranberries; usually always make it into the mix.  But you really can use any nuts or dried fruit you have lying around.  Today, I made Cherry-Nut Granola Bars.
First, prepare a 9” x 13” pan by spraying with non-stick cooking spray and cut a piece of parchment paper to cover the bottom and sides of the pan. Set aside.
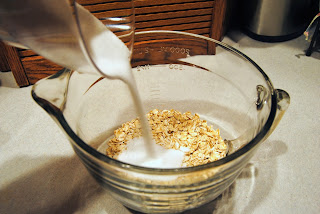
After measuring 2 cups of oats, add 1/2 cups of sugar.  I used regular white sugar, but you could use any type of sugar like brown or coconut.
Add in 1/2 teaspoon of salt.
Next, you need to add in total, 2 1/2 cups of extras.  I added a 1/2 cup each of mini chocolate chips, dried cherries and cranberries with chopped pecans and almonds.
After measuring 1/3 cup of almond butter, add 1/4 cup of honey and 1 tablespoon water.  Then add 3 tablespoons of melted chocolate coconut butter and 3 tablespoons of melted coconut oil.
Mix together all the wet ingredients before combining with the dry ingredients.  Mix until all the dry ingredients are evenly coated with wet mixture.
It should look like this.
Spread the mixture into the prepared pan.  You may need to press the mixture into the pan to ensure that it is tightly packed together.  Bake in a 3500F oven for about 10 minutes.  You should begin to smell the chocolate and nuts toasting.
Remove from the oven and let cool completely; it should take about 30 minutes.  It’s better if they set up before you try and cut them, otherwise you will be dealing with granola bars that don’t want to stay together.
These granola bars will disappear in no time.  A good portion of the pan I just made is already gone!

Cherry-Nut Granola Bars
Yield: 12 squares
Prep Time: 15 minutes
Bake Time: 10-15 minutes

Ingredients:
  • 2 cups oats
  • 1/2 cup sugar
  • 1/2 teaspoon salt
  • 1/2 cup mini chocolate chips
  • 1/2 cup dried cherries
  • 1/2 cup dried cranberries
  • 1/2 cup chopped pecans
  • 1/2 cup chopped almonds
  • 1/3 cup almond butter
  • 1/4 cup honey
  • 1 tablespoon water
  • 3 tablespoons coconut butter, melted
  • 3 tablespoons coconut oil, melted
Directions:
  1. Preheat oven to 350 degrees.
  2. Grease a 9"x13" pan with non-stick cooking spray and cut parchment paper to cover bottom and sides of the pan.  Set aside.
  3. Combine oat, sugar, salt, chocolate, dried fruit, and chopped nuts into a medium bowl.
  4. In a small bowl combine almond butter, honey, water, coconut butter, and coconut oil.
  5. Add wet ingredients to the medium bowl and mix together until dry ingredients are evenly coated.
  6. Spread into the prepared pan and bake for 10-15 minutes, until you can smell the toasted nuts and it is golden.
  7. Remove from oven and let cool completely before cutting into squares.

Thursday, November 14, 2013

10 Ways to Use Apples


Apples are probably one of my favorite fruits to eat during the fall.  Why shouldn't they be?  Apples are high in Vitamin C, fiber, and low in calories.  As the saying goes, "An apple a day, keeps the doctor away."  Lately, I have been obsessed with making applesauce.  

1.  Baked Apples.  
Core the apple.  Sprinkle with some cinnamon and brown sugar, maybe even add some raisins and pecans.  Wrap them in foil and bake in the oven until soft.  

2.  Apple Crisp
A much easier option that closely relates to apple pie.  Dice up apple and sprinkle with spices and sugar.  Add to pan and add a crumb on top.  My favorite crumb topping is butter, brown sugar, oats, pecans, and flour.

3.  Apple Pie
You can't go wrong with the classic apple pie.  

4.  Applesauce
Apple sauce is one of the best ways to use apples that are starting to rot.  Cut away the unappealing, rotting portion and throw all the apple in a pot with a small amount of water and spices.  Finish by pureeing the apples to a thin consistency.

5.  Apple Chips
Thinly sliced apples, add spices or just keep them plain.  Place in a 200 degree oven and bake until they are crispy.  Then you have a perfect on-the-go snack.

6.  Apple butter
Similar to making applesauce, simmer and puree the apples to a thick consistency.  Then enjoy spread on bagels or toast.

7.  Applesauce instead of oil
Once you have made pounds of applesauce, you can use it in place of oil when baking.  Instead of using oil in your spice cake, use applesauce.
8.  Caramel Apples
Perfect activity to do with the kids.  You can either make the caramel on your own or melt caramel from the store.  Then dip the apples into the caramel and roll in various toppings like chopped nuts, chocolate, coconut, and more.

9.  Serve them with pork
Saute apple with onions in apple cider to serve along pork chops, it's the perfect fall dinner

And finally...
10.  Just plain eat them!
Apples are perfect for snacking on in the middle of the day.  Add some peanut butter to give yourself some protein.

Tuesday, November 5, 2013

Outside The Box: Caramel Swirled Coconut Brownie

I understand that some find it daunting to bake from scratch, especially if it’s your first time.  A more comfortable and creative step is to improve the boxed mixes by adding your own ingredients.  It just takes a little bit more effort to throw in some nuts, chocolate chips or even swap out the oil for applesauce.  Below is the first post in a new weekly series called Outside The Box.
This week’s recipe is Caramel Swirled Coconut Brownies.  Caramel, coconut, and chocolate: it doesn’t get better than that.

I love coconut - even more because my dad hates it.  Currently he thinks that everything I make has to have coconut in it.  This is perfect because it ensures that he won’t eat any of my brownies.  That’s fine.  More rich, chocolaty, ooey gooey perfection for me.
This is a blog for scratch baking, so the caramel is homemade. 

WARNING: When cooking sugar, be careful to not burn yourself.  If you don’t feel comfortable working with hot sugar, don’t be afraid to buy the caramel at the store.  Always remember to proceed with caution when making caramel. Wear ovenmitts or use kitchen towels to protect your hand and arms.

In my caramel recipe, I added coconut milk to get more coconut flavor into the brownies.  However, the caramel was too thin, so I had to add heavy cream and cook for about 5 minutes.   If you don’t have coconut milk, 1 cup of heavy cream should work just fine.
Caramel Recipe
Yields: 2 cups

Ingredients:


  • 1 cup sugar
  • 1/2 cup water
  • 2 ounces butter
  • 1 cup canned coconut milk
  • 1/2 cup heavy cream
Directions:
  1. In a large pot, heat sugar and water over medium heat.
  2. When sugar is dissolved and beginning to boil, stir or swirl pan to ensure even cooking.
  3. Cook sugar until the it becomes a dark amber color, about 10 minutes.
  4. Once sugar has reached the perfect color, remove from heat and stir in butter, coconut milk, and heavy cream.
  5. If caramel hasn't thickened, you may need to cook over medium hear for another 5 minutes.
  6. Cool caramel in an ice bath, before using in brownies.
Caramel Swirled Coconut Brownies
Yield: 9"x13" pan, about 16 squares

Ingredients:
  • 1 (19.5 ounces) box brownie mix (any brand)
  • 1/2 cup oil
  • 1/4 cup water
  • 2 eggs
  • 1/2 cup coconut flakes
  • 1/2 cup bittersweet chocolate chips
  • Caramel sauce (from above recipe)
Directions:
  1. Preheat oven to 350 degrees.
  2. Grease a 9"x13" pan with non-stick cooking spray.  Set aside.
  3. To the brownie mix, add oil, water, and eggs.  Stir with wooden spoon until combined.
  4. To the batter, add coconut flakes and chocolate chips.
  5. Pour half of the batter into the greased pan and spoon a couple of tablespoons of caramel sauce on top.
  6. Pour the rest of the batter into the pan.
  7. Dollop the caramel sauce on top and using the tip of a knife, swirl the caramel into the brownie batter.
  8. Bake for 28-31 minutes or until a toothpick in the center comes out clean.

Monday, November 4, 2013

Quick and Easy Beer Bread

After my brother’s engagement party, my family was left with an almost full refrigerator of beer.  So it has been a constant battle to get rid of the beer by either giving it away (which no one seems to want) or cooking with it.  Drinking it is out of the question.   We aren’t beer drinkers at all.
One of the most clever ways to get rid of a bottle of beer is to make beer bread.  All it take is flour, baking powder, sugar, salt, butter, and beer, plus any addition ingredients to add a unique flavor.  I added lemon zest to compliment the beer I used, but you could add bacon, cheddar, onions, or various herbs.  It is really up to you what you want it to taste like.
This was the best beer bread that I have ever had.  Because of the 1/2 stick of butter you pour on top, the bread was super buttery and delicious.  It also wasn't dense like most beer bread can be, it was light and fluffy with a great texture.  


Quick and Easy Beer Bread
Adapted from Dine and Dash
Yield: 1 (9”x5”) loaf
Prep Time: 5 minutes
Bake Time: 50-55 minutes

Ingredients:


  • 3 cups flour
  • 3 teaspoons baking powder
  • 1 teaspoon salt
  • 1/4 cup sugar
  • 1 teaspoon lemon zest
  • 12 ounces beer, any kind
  • 1/2 stick butter, melted
Directions:


  1. Preheat oven to 375 degrees.
  2. In a medium bowl combine flour, baking powder, salt, sugar, and lemon zest.
  3. Add beer and stir until well incorporated. Be careful not to over mix.
  4. Spray loaf pan with cooking spray and pour batter into pan, the batter will be lumpy.
  5. Pour melted butter over the top of the batter.
  6. Bake for 50-55 minutes, until golden brown, and a toothpick poked in the center comes out clean.
  7. Remove from oven and allow to cool for 15 minutes before removing from pan.